Getting Started Android
You're 5 steps away from adding great in-app support to your Unity game.
Guide to integrating the Unity plugin for the Helpshift SDK which you can call from your C# and Javascript game scripts.
Requirements
- Unity 5.5.6 and above.
- Supported Android OS version: 14 and above
If you have a project with Unity version prior to 5.3, you could use the build mentioned here.
Download Helpshift Unity SDK
Helpshift SDK .zip folder includes:
| helpshift-plugin-unity-[version].unitypackage | Unity package of Helpshift SDK X |
| HelpshiftUnityAndroidResources/ | Open source project to customize the theme and string resources for Android project |
| unity-jar-resolver (v1.2.104.0) | Resolves Android Helpshift package support lib dependencies. |
We recommend you to upgrade to the latest SDK as mentioned above. However, if you are currently using Unity SDK 4.x and need more details, click here.
Add Helpshift to your Unity project
- Unzip the Helpshift Unity SDK package.
- Helpshift Unity SDK appears as a standard
.unitypackagewhich you can import through the Unity package import procedure. - Following are the steps to import the
helpshift-plugin-unity-version.unitypackageinto your Unity game:- If you have integrated Helpshift SDK previously, delete the existing
Assets/Helpshiftfolder from your unity project. - In the Open Unity project, navigate to Assets drop-down menu and select the Import Package > Custom Package
- From the unzipped SDK, select
helpshift-plugin-unity-version.unitypackagefile to import the Helpshift SDK. - In the Import Unity Package window, click Import
- If you have integrated Helpshift SDK previously, delete the existing
Resolve Android Support library requirements
Helpshift SDK depends on android support libraries. You can get these libraries in one of the following ways depending on the build process that you use.
Resolve dependency when using Unity's Internal or Unity's internal Gradle build system
Use Unity Jar Resolver plugin to download and integrate android library dependencies.
If your project already uses the Unity Jar Resolver, you can skip the Unity Jar Resolver importing step.
- Import the Unity Jar Resolver plugin into your Unity project
- In the Open Unity project, navigate to Assets drop-down menu and select the Import Package > Custom Package
- From the unzipped Helpshift SDK, select
unity-jar-resolver/external-dependency-manager-1.2.160.unitypackagefile to import the Unity Jar resolver. - In the Import Unity Package window, click Import
If you are not able to import Unity Jar Resolver packaged with Helpshift plugin due to any reason, you can use any version of Unity Jar Resolver as per your needs. Refer here: Unity Jar Resolver
- If the Unity Jar resolver wants to enable Android Auto-resolution, click the Enable button, to resolve all the dependencies automatically on changing any dependency file. You can enable or disable the settings using Assets > Play Services Resolver > Android Resolver > Settings
- By default, the Unity jar resolver auto-resolves all the required dependencies. Following are the steps to resolve dependencies manually:
- In the Open Unity project, navigate to Assets dropdown menu and choose Play services resolver > Android Resolve
- Select the Resolve or Force Resolve
- To know more about the Unity Jar Resolver, refer to: Unity Jar Resolver
Resolve dependency when using custom Gradle template or Export Project
Unity's in-built gradle build support and exporting to android studio does not support per plugin gradle script. Therefore, by default, Helpshift SDK cannot add the dependencies by itself.
The mainTemplate.gradle is genereted when you enable the Custom Gradle Template property on the Player window.
The build.gradle exists in generated Gradle project when you enable the Export Project property on the Player window and Build the project.
Update dependencies section of the mainTemplate.gradle or build.gradle file as:
    dependencies {
        implementation fileTree(dir: 'libs', include: ['*.jar'])
        implementation(name: 'Helpshift', ext:'aar')
        implementation(name: 'helpshift-plugin-resources', ext:'aar')
        implementation project(':helpshift-plugin-wrapper')
        implementation 'com.android.support:design:26.0.2'
        implementation 'com.android.support:recyclerview-v7:26.0.2'
        implementation 'com.android.support:cardview-v7:26.0.2'
    }
Add package name to AndroidManifest.xml
If you are using Unity 2020 or higher version, please update the name of helpshift-plugin-wrapper directory located at /Assets/Plugins/Android/helpshift-plugin-wrapper to helpshift-plugin-wrapper.androidlib
Please refer troubleshooting for more information.
If you are using gradle build system then ${applicationId} is automatically replaced during build time.
Otherwise, open AndroidManifest.xml located at <project_dir>/Assets/Plugins/Android/helpshift-plugin-wrapper/ and look for ${applicationId} located in <provider> tag. Replace it with the package name of your android app.
As an example, if your package name is com.Company.ProductName, <provider> tag will now look like this:
        <provider
            android:name="com.helpshift.support.providers.HelpshiftFileProvider"
            android:authorities="com.Company.ProductName.helpshift.fileprovider"
            android:exported="false"
            android:grantUriPermissions="true" >
            <meta-data
                android:name="android.support.FILE_PROVIDER_PATHS"
                android:resource="@xml/hs__provider_paths" />
        </provider>
Initializing Helpshift in your app�
To use Helpshift's APIs, please import the Helpshift's namespace like below
using Helpshift;
Helpshift SDK uniquely identifies your App with the combination of:
| API Key | Your unique developer API Key. |
| Domain Name | Your Helpshift domain name. For example : foo.helpshift.com |
| App ID | A unique ID assigned to your app. |
To get the API Key, Domain Name and the App ID, navigate to Settings>SDK (for Developers) in your agent dashboard and scroll down to "Initializing Helpshift" section. 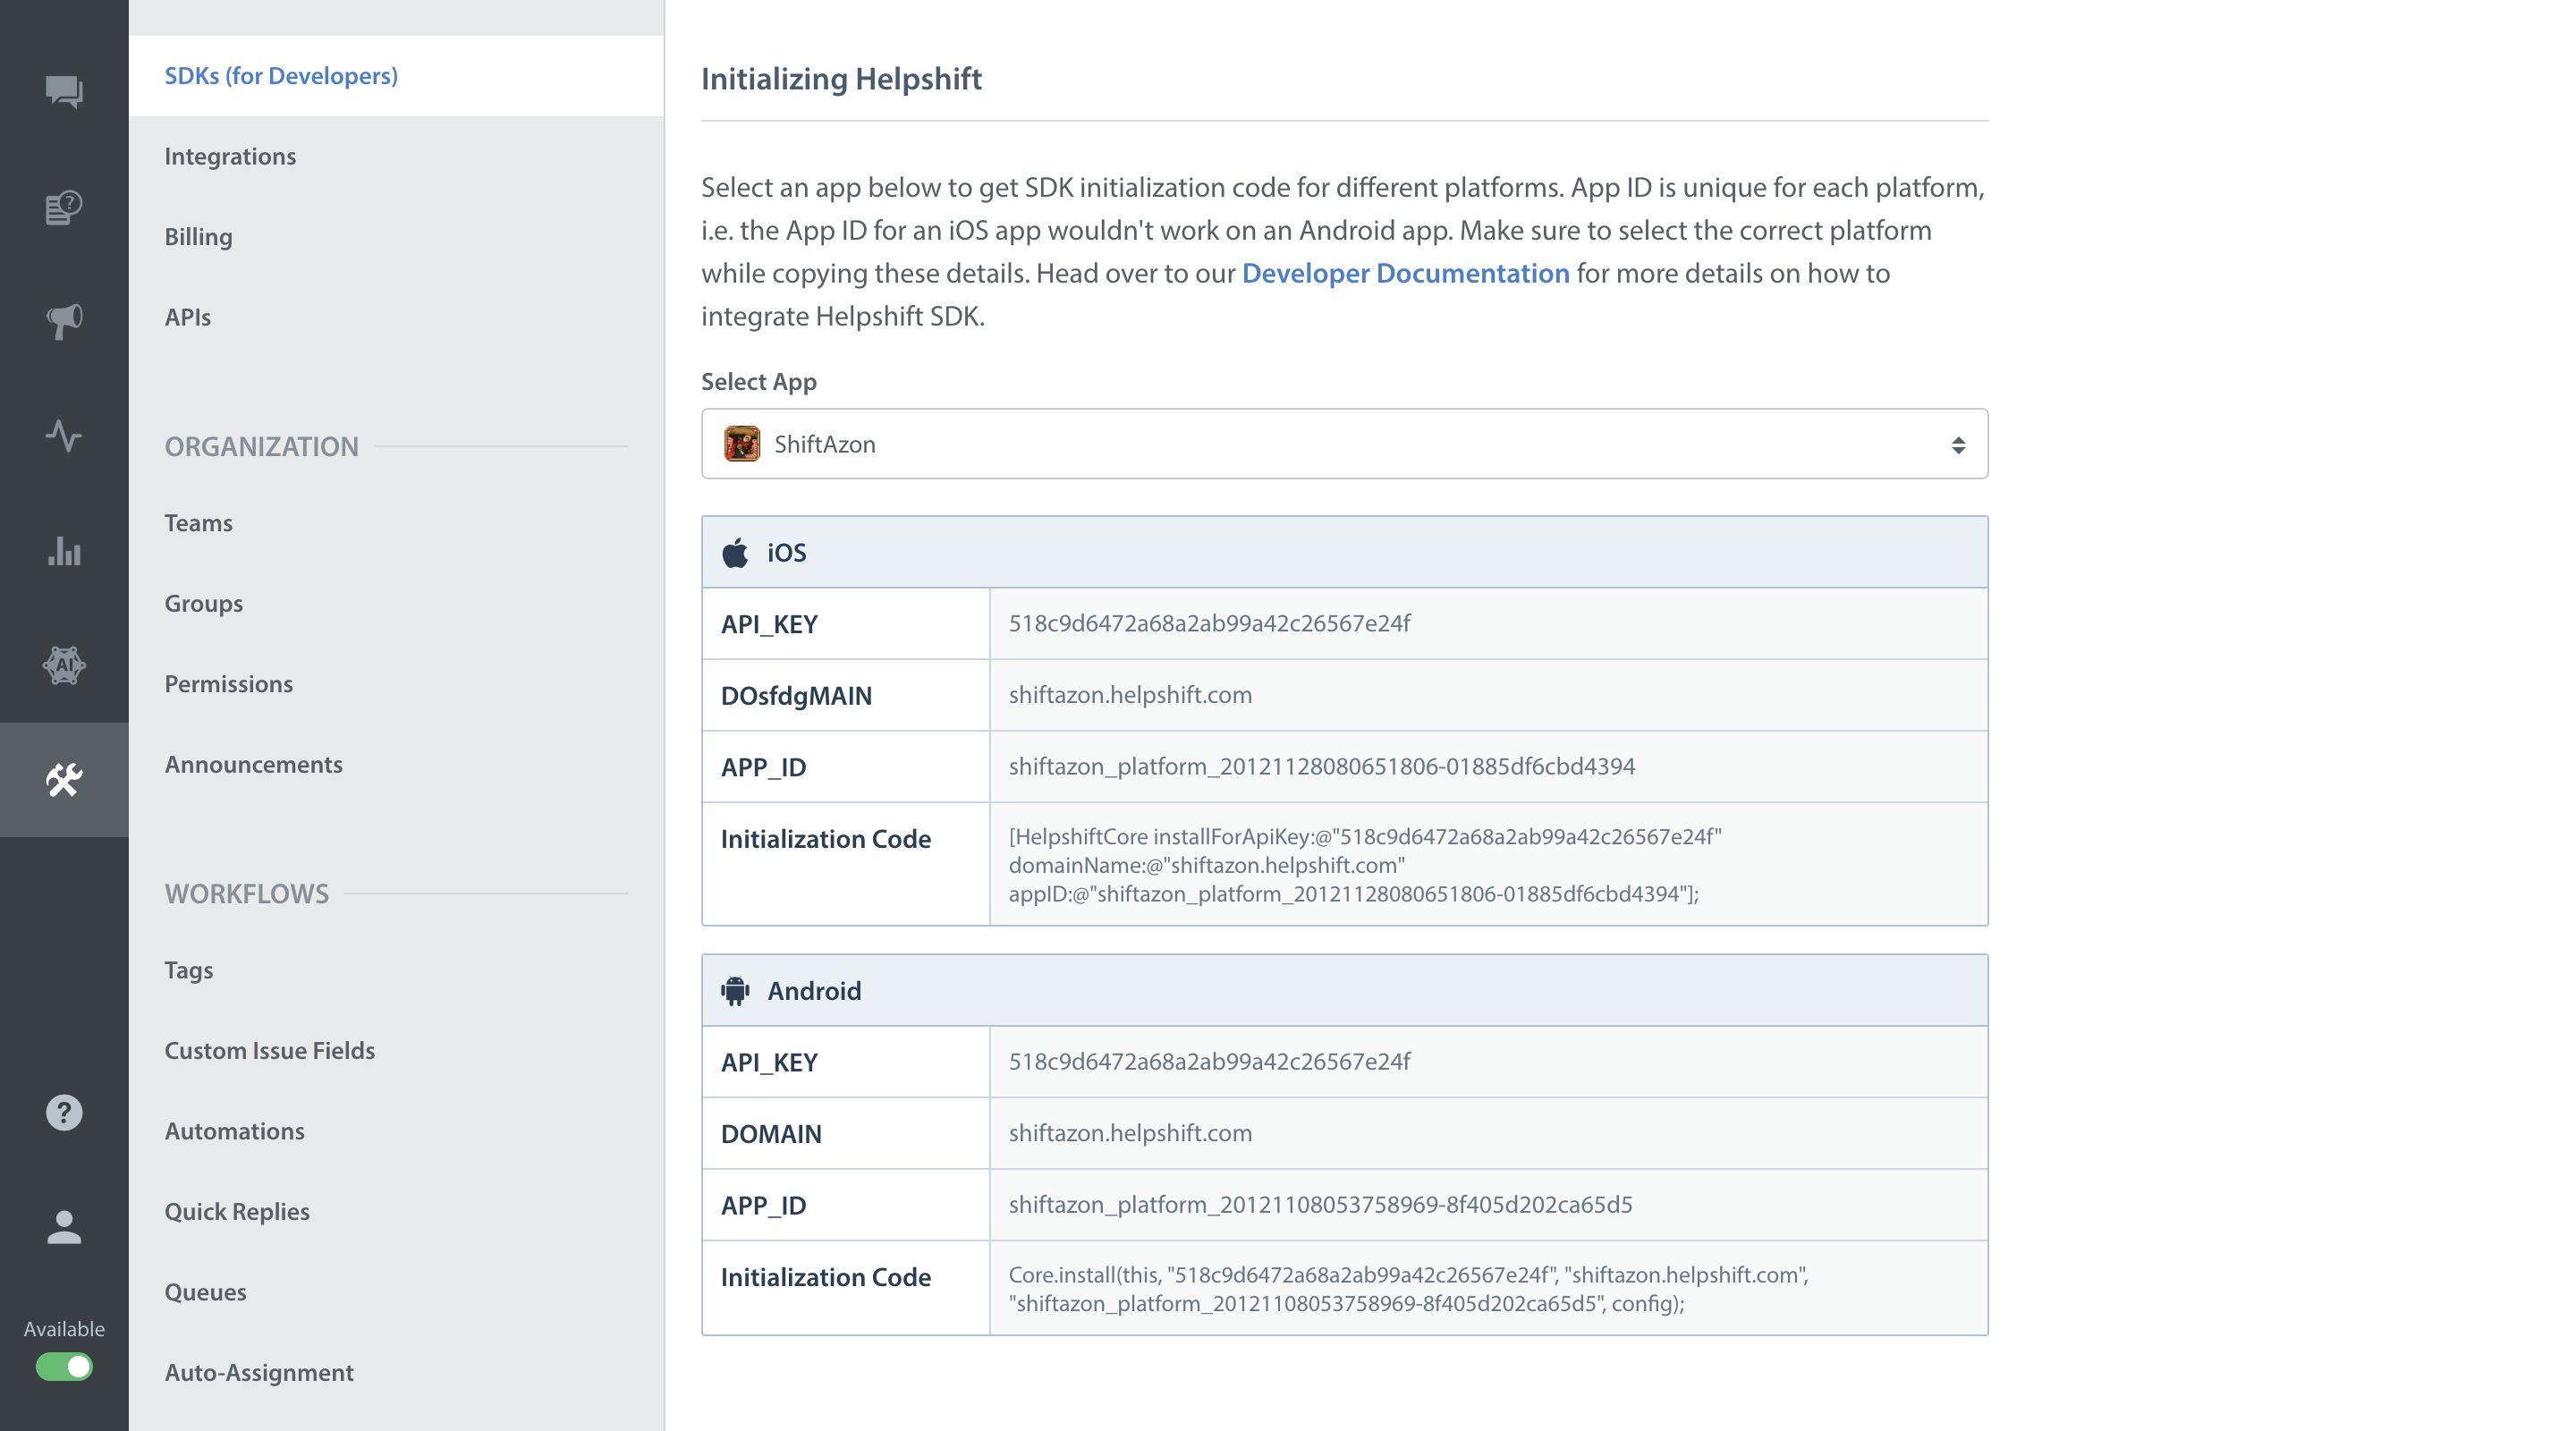
Select your App from the dropdown and copy the three tokens to be passed when initializing Helpshift.
Initialize Helpshift by calling the method install(apiKey, domain, appId) API
    using Helpshift;
    .
    .
    .
    public class MyGameControl : MonoBehaviour
    {
        private HelpshiftSdk help;
        ...

        void Awake() {
            help = HelpshiftSdk.getInstance();
            var configMap = new Dictionary<string, object>();
            help.install("<API_KEY>", "<DOMAIN_NAME>", "<APP_ID>", configMap);
        }
        ...
    }
Start using Helpshift
Helpshift is now integrated in your app. You should now use the support APIs to present FAQ or conversation screens inside your app.
Run your app, and try starting a test conversation using the ShowConversation API call. Then goto your Helpshift agent dashboard and reply to experience the in-app messaging.
Sample usage for FAQs and conversation APIs:
    public class MyGameControl : MonoBehaviour
    {
        private HelpshiftSdk help;

        void OnGUI () {
            ...
            var configMap = new Dictionary<string, object>();
            // Presenting FAQs to your customers
            if (MenuButton (helpButton))
            {
                help.showFAQs(configMap);
            }

            // Starting a conversation with your customers
            if (MenuButton (contactButton))
            {
                help.ShowConversation(configMap);
            }
        }
    }
Since the Helpshift plugin is meant for mobile devices only, you should put all Helpshift calls inside checks to make sure they are only called when running on a device. / #run-on-device /